
The Importance of Leather Thickness: Shaving Cylinder Configuration
Thickness is an important specification for all types of leather including garment, footwear, furniture, and automotive upholstery. Shaving is the step in the leather making process, usually after splitting or wringing, where the final thickness of the leather is determined and controlled. After shaving, subsequent processes will have little influence on thickness as the hide should be in a preserved and stable condition. When the tanned hide arrives at the shaving machine, it should be sorted for thickness already so the machine is not overworked. If the splitting or sorting was not done correctly, then other defects could be created by the shaving machine. For now, I want to look at the one unavoidable defect caused by shaving. The dreaded “shaving line”.
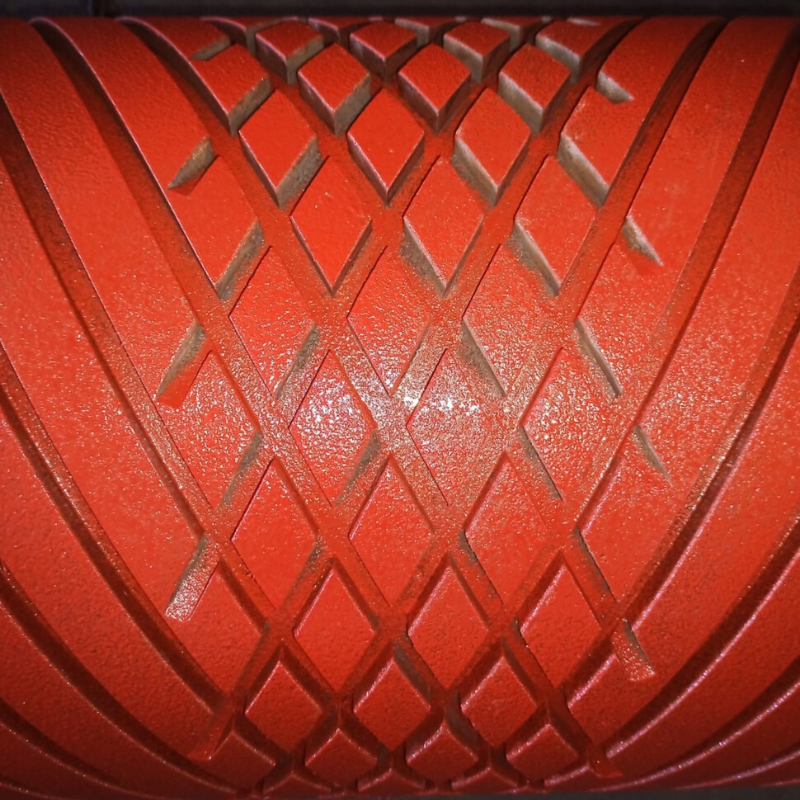
The shaving cylinder is a heavy steel roller cut with grooves that hold sharpened steel knives or shaving blades. The blades are configured in a spiral arrangement turning outward as the cylinder spins. This configuration helps to spread or open the wrinkles and folds as the hide feeds out of the machine. The blades are wound onto the cylinder from the sides where the right and left sides meet in the center. The fibers on the flesh side (opposite the smoother grain side) are the ones cut by the blades. These fibers are compacted by the shaving process and since the right and left blades are “pulling” the hide in opposite directions, the color or texture of the hide could appear different. Since the blades overlap in the center, a center line is visible where the fibers have been pulled in both directions repeatedly.
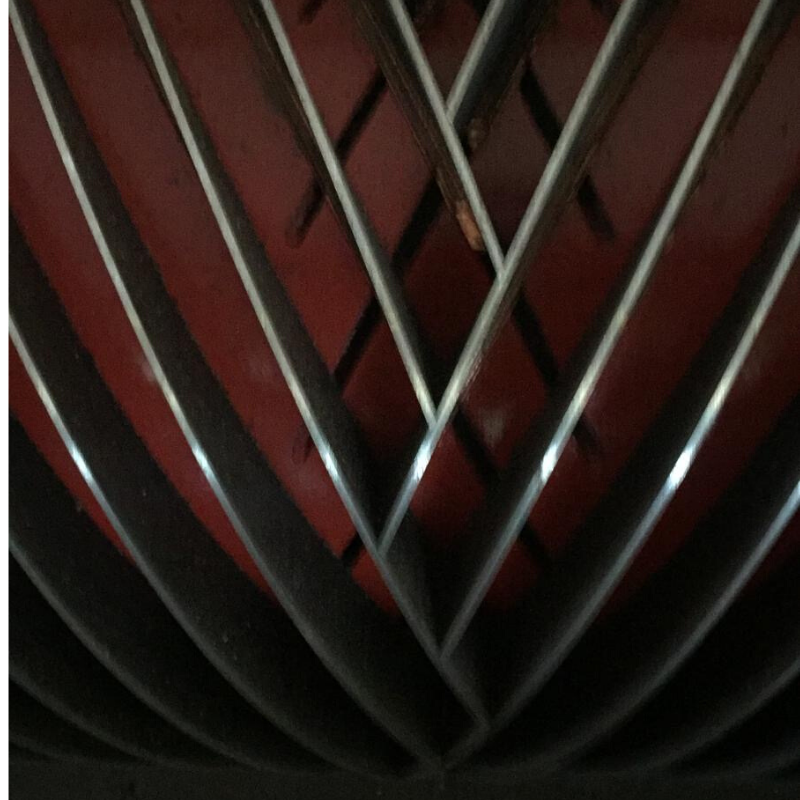
The cylinder rotates at around 1800 rpm cutting leather while being sharpened by a stone mounted on the back of the shaving machine. This keeps the blades sharp but also wears them down to the point where they must be removed and replaced. At this point, the tanner can decide how to install the next set of blades to help reduce the effect of the center line defect. There are basically 2 choices:
1. A simple alternating pattern of 1 right and 1 left blade.
2. A staggered pattern of 2 or 3 rights followed by 2 or 3 lefts.
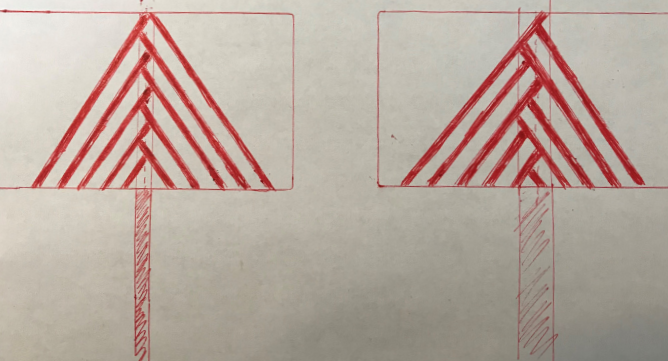
A simple pattern creates a narrower but more defined center line while staggering the pattern gives a less stark line. The downside to the staggered pattern is that the wider line covers a larger surface area of the hide. With some types of leather, the staggered pattern can minimize the effect enough to make it almost invisible to the end user.
So if you think you want to give it a try, you just need to make sure the cylinder you have can hold the blades in the configuration you need. That means that the center of the cylinder must have enough overlapping groves to allow this type of mounting.
If your cylinder doesn’t have these overlapping groves, it’s possible to extend the existing ones by a qualified reblading technician. Make sure to use only premium quality shaving blades like Heusch FGS, FA, or Excalibur (stainless steel) mounted ONLY using copper tamping by a professional reblading technician using a pneumatic reblading machine.

For more information or if you have any questions or concerns, please contact us at First Source Worldwide LLC or Tanmach Limited.